


 中文
中文 한국어
한국어Ms.Lizzy
Hi, this is Lizzy from Dinosaw ( Not a Robot ). Which Machine ( model ) do you want? Please WhatsApp us now
Open Hours:8:30am-20:30pm
WhatsApp: +86 198-5901-3937
 Sep 6, 20254 MIN READ
 Sep 6, 20254 MIN READ
A pro guide for fabricators to fix swirl marks & hazing on granite & quartz. Learn machine parameters, tooling secrets & get a troubleshooting checklist.
Swirl marks, hazing, and polishing burns are costing your stone fabrication shop thousands in rework, delays, and lost reputation. These defects represent the gap between acceptable work and the mirror-like polish that commands premium prices- and they're completely preventable with the right approach.
This guide gives stone fabrication professionals the systematic approach to eliminate swirl marks on granite, quartz, and other stones forever. You'll get step-by-step processes, troubleshooting checklists, and proven machine parameters that guarantee consistent, defect-free results-transforming your shop from reactive problem-solving to proactive quality control.
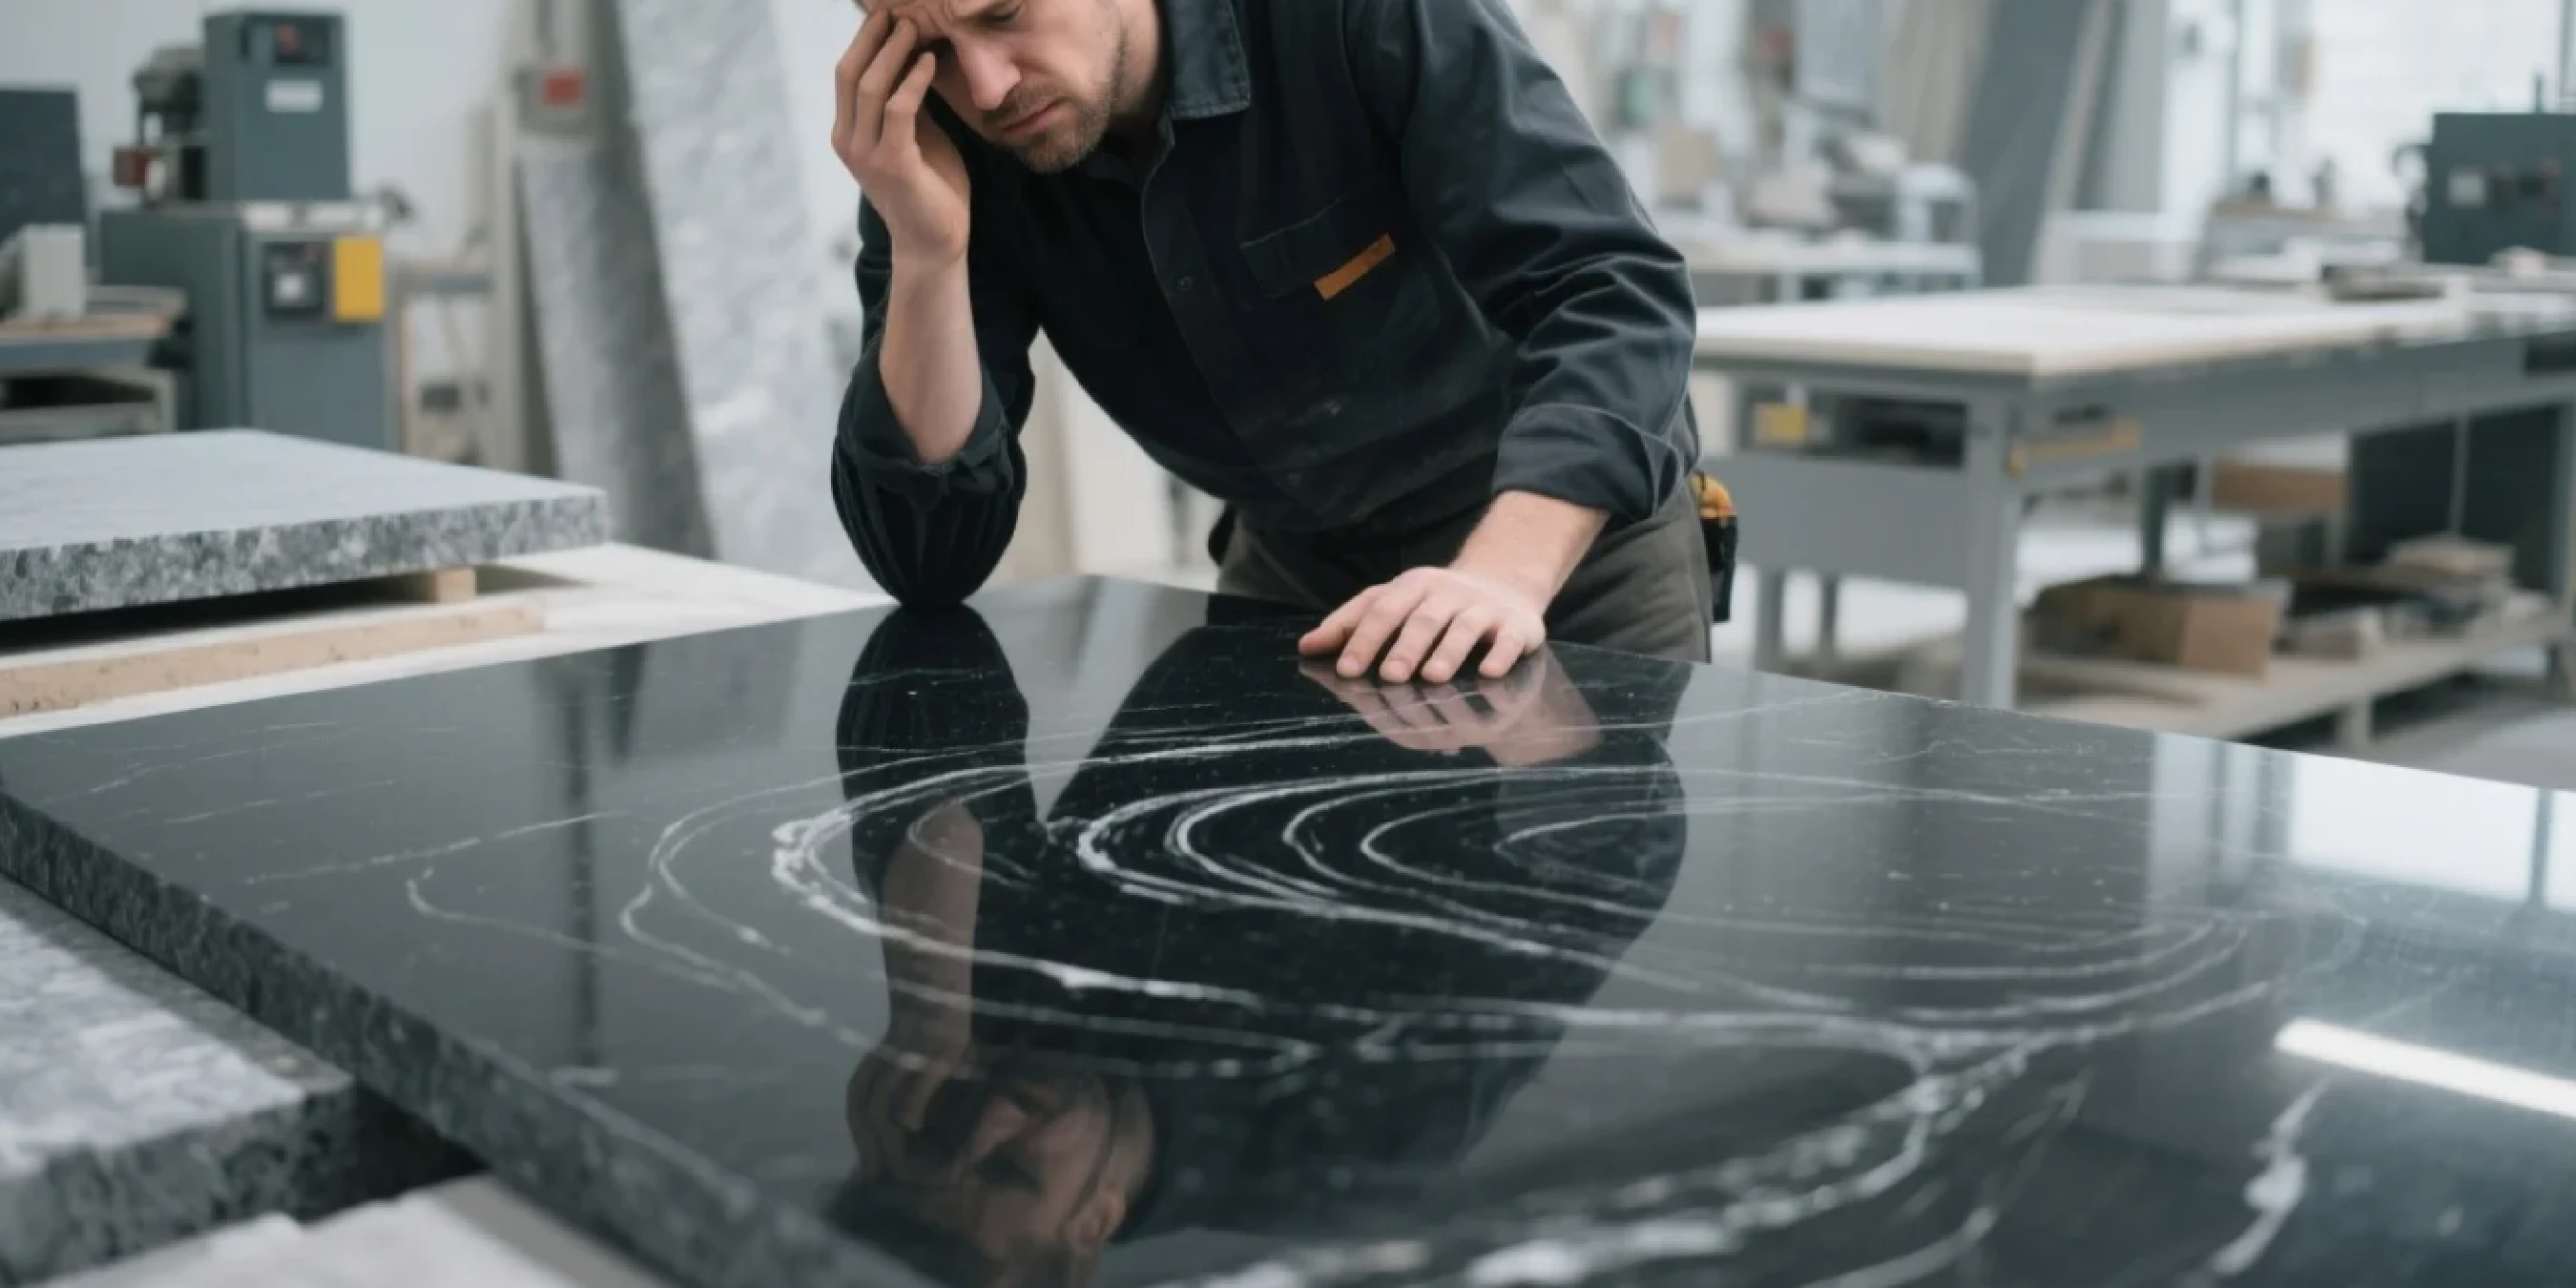
In a high-production environment, polishing defects are rarely caused by a single mistake. They're typically the result of an imbalance between three critical factors: the machine, the tools, and the process. Understanding how they interact is the first step toward eliminating swirl marks and hazing for good.
Your polishing machine is a precision instrument, but if its parameters aren't perfectly tuned to the material, defects are inevitable. The most common culprits include:
According to the Natural Stone Institute (NSI) Finish Standards , a "polished" finish must be free of visual defects. Proper pressure management is key to meeting this benchmark.
Your machine is only as good as the tools you put on it. Using the wrong abrasives or failing to maintain them is a direct path to a flawed finish.
The most common tooling error is "jumping grits"-skipping a step in the polishing sequence (e.g., going from a 200 to an 800 grit pad). This lazy practice guarantees that the finer pad will be unable to remove the deeper scratches left by the coarser one, resulting in visible swirl marks.
A complete, sequential grit progression is non-negotiable.
Different pads are designed for different stages. Metal-bond pads are for aggressive initial grinding (calibration), while resin-bond pads are for the higher grits and final polish.
Transitional pads, often a mix of ceramic or copper, are crucial for smoothly bridging the gap between the metal and resin stages. Using the wrong type of bond at the wrong stage will ruin the surface.
Over time, polishing pads can become glazed or loaded with slurry, reducing their cutting efficiency. "Dressing" the pads with a dressing stone cleans the surface and re-exposes the diamonds, restoring their cutting ability.
As detailed in many technical articles from Stone World Magazine, proper tool maintenance is as important as the polishing process itself.
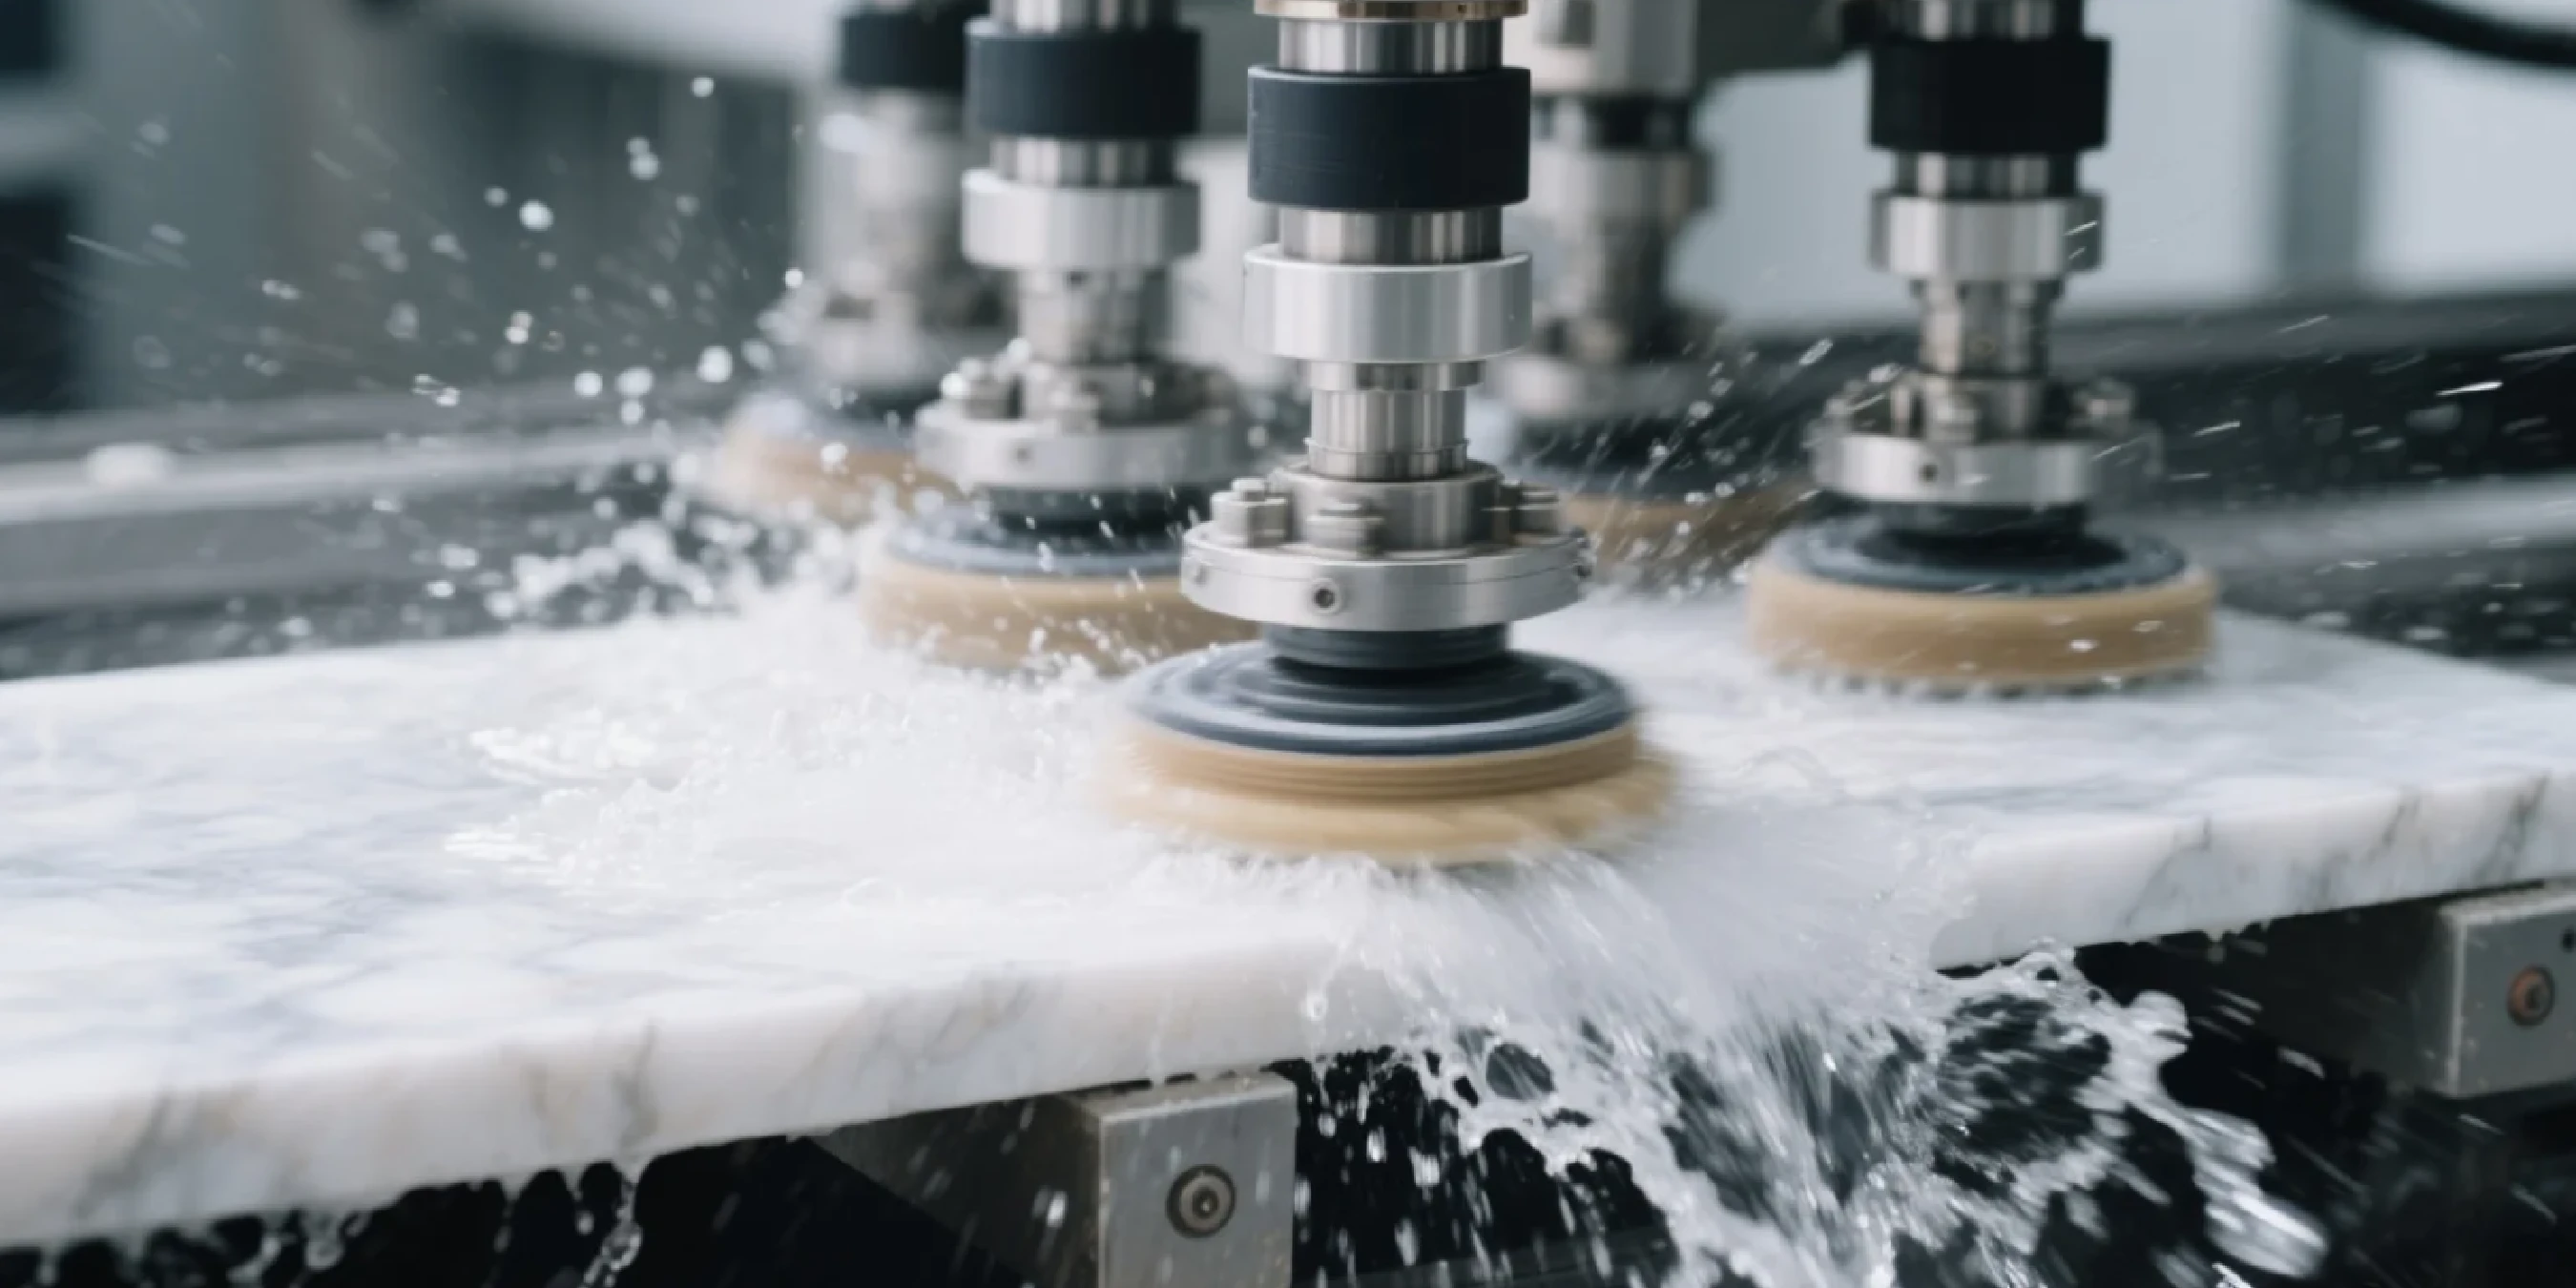
Water is not just a lubricant in stone polishing; it's a critical coolant and cleaning agent.
Achieving a perfect polish is a science. Follow this systematic process to ensure consistent, repeatable results in your shop.
Before the first polishing pad ever touches the stone, inspect the surface. A perfect polish starts with the right blade for cutting granite.
Ensure the initial cut is clean and free of chipping or deep saw marks. Any surface defects left from the cutting stage will require significant extra grinding to remove, increasing time, cost, and the risk of creating new flaws.
Different stones require different parameters. What works for a hard Black Galaxy granite will destroy a softer engineered quartz. Create a "recipe book" for your common materials.
| Material Type | Spindle Speed (RPM) | Feed Rate (m/min) | Key Consideration |
|---|---|---|---|
| Hard Granite | 1200 - 1800 RPM | 1.5 - 2.5 m/min | Requires higher pressure and a full sequence. |
| Marble / Softer Stone | 800 - 1400 RPM | 2.0 - 3.0 m/min | Prone to heat damage; use lower RPM and ample water. |
| Engineered Quartz | 1000 - 1500 RPM | 1.8 - 2.8 m/min | Resins can burn; Adhere to manufacturer specs. |
These are starting points. Always test on a scrap piece and adjust as needed. The International Surface Fabricators Association (ISFA) Standards provide excellent guidelines for working with engineered materials.
Execute a full, sequential grit progression without skipping steps.
Ensure the surface is thoroughly rinsed between each grit change to remove all abrasive particles from the previous step.
Don't rely on overhead lighting for quality control. Use a low-angle light source (like an LED bar) held parallel to the surface. This will reveal any subtle swirl marks or hazing that would otherwise be invisible.
Inspect the slab from multiple angles before it moves to the next stage of production.
When defects appear, don't guess. Use this checklist to systematically diagnose the problem.
Struggling with a persistent polishing issue? Our experts have seen it all. Get a free, no-obligation consultation to diagnose your problem. Need professional advice? Contact our experts now
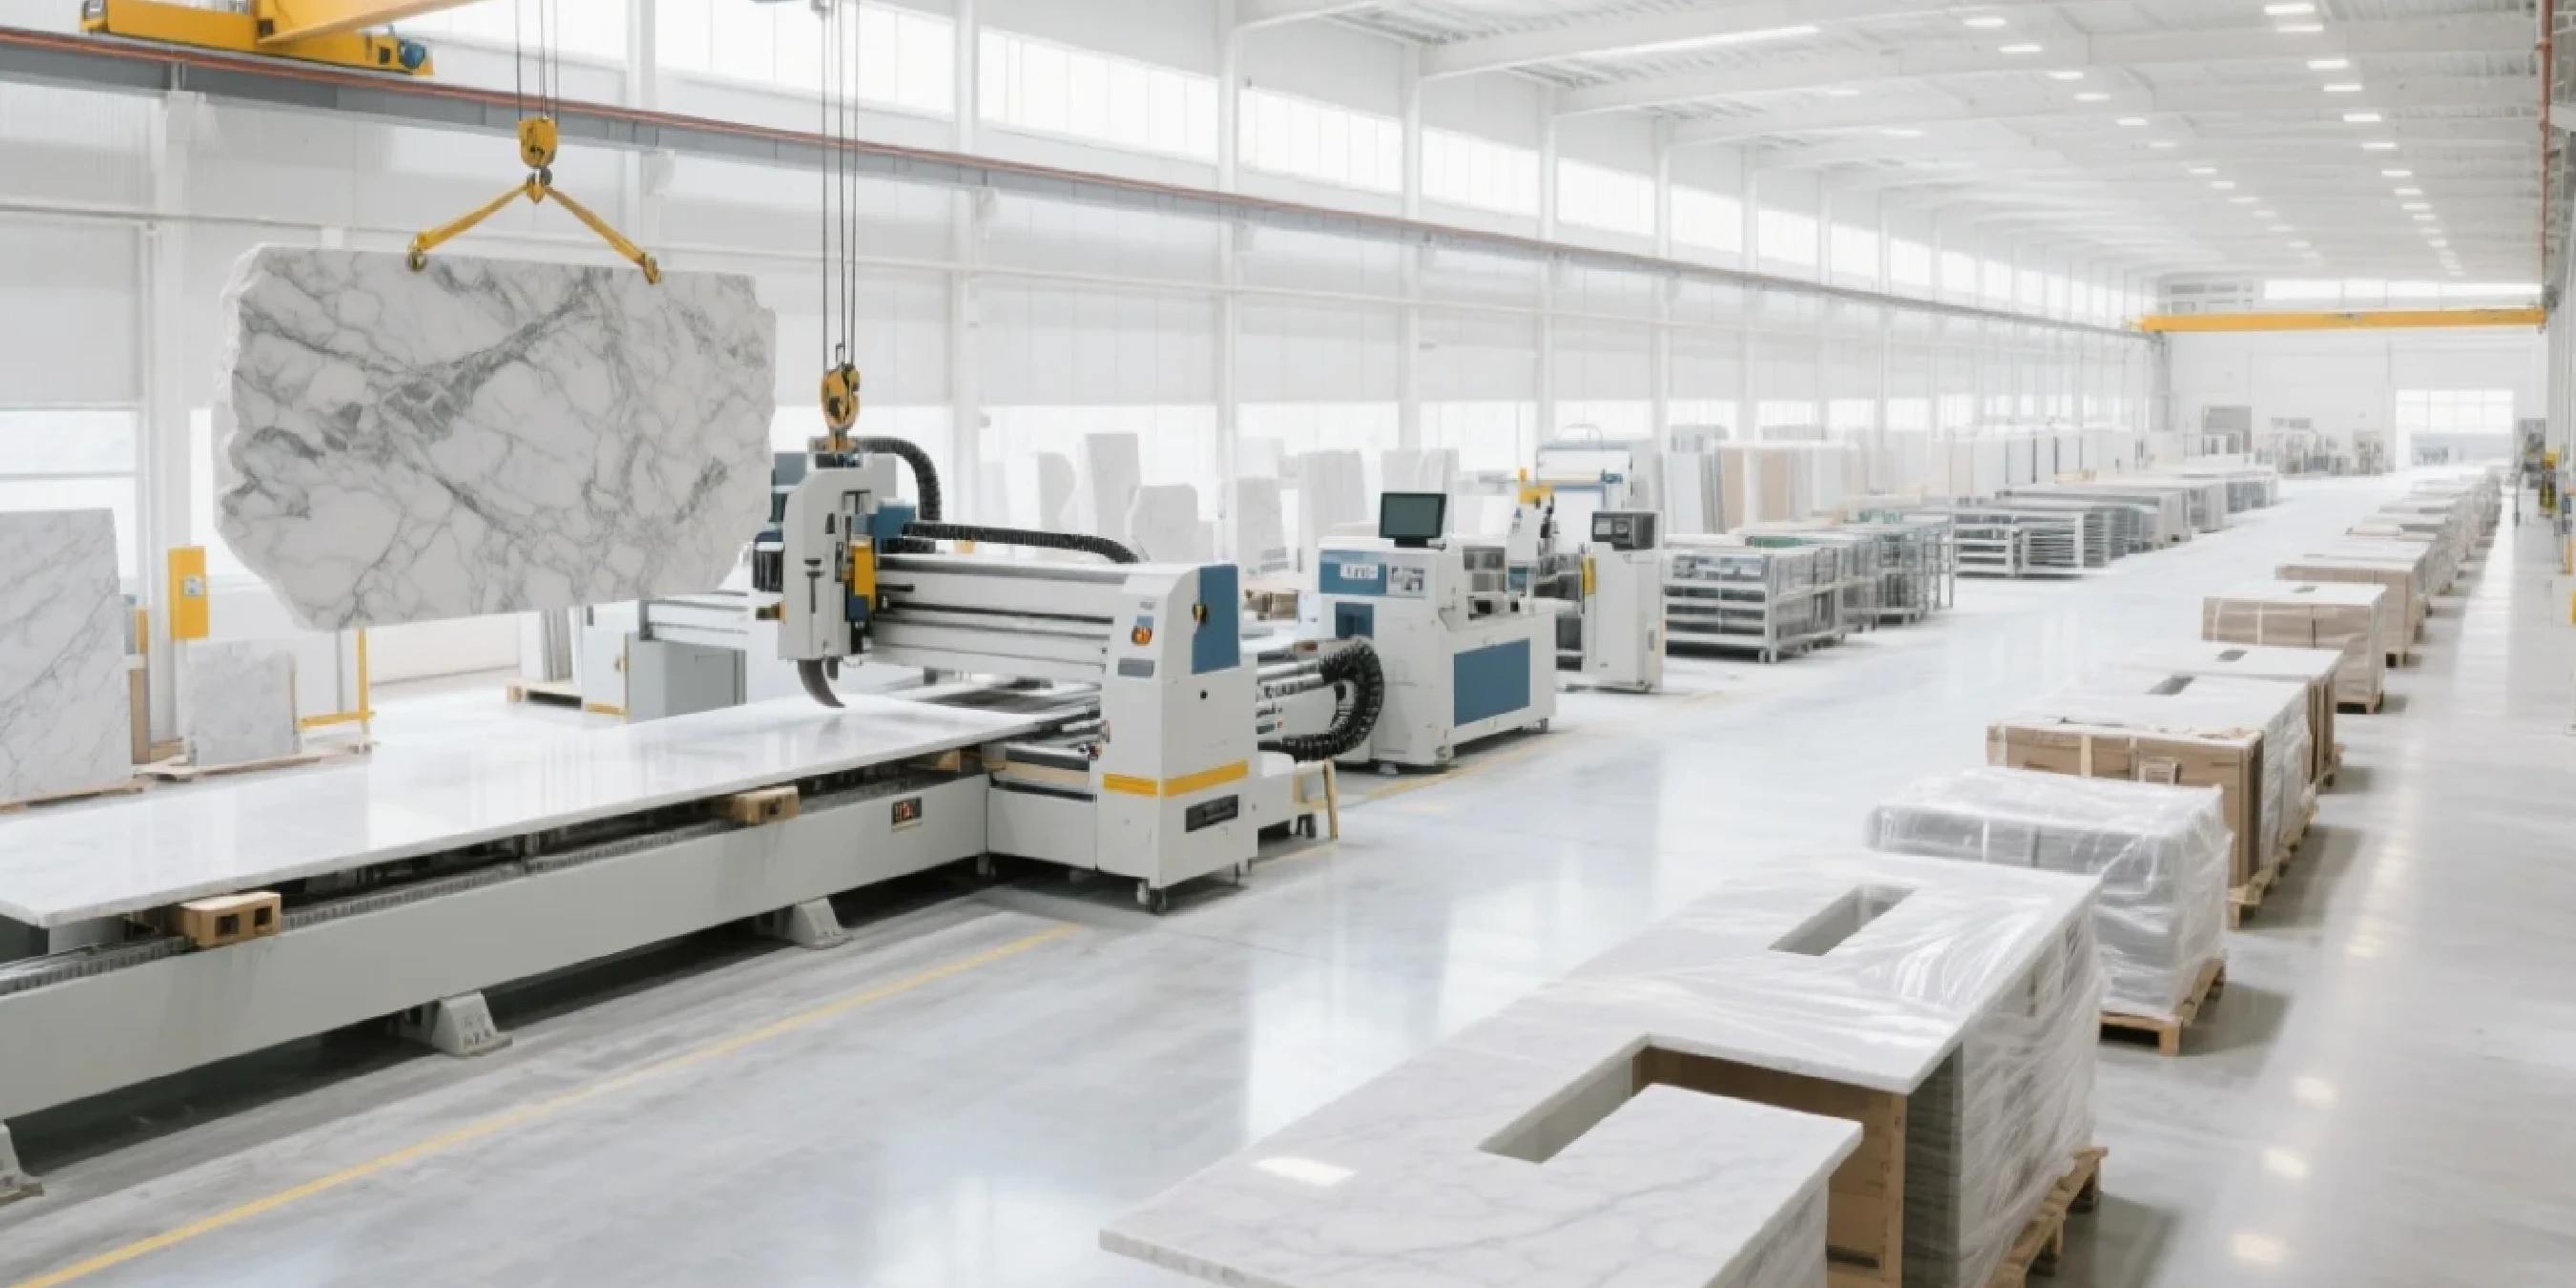
While process and tooling are critical, the mechanical integrity of your machinery is the foundation of a flawless finish. Constant rework and troubleshooting are often symptoms of using equipment that lacks the necessary precision and stability.
This is where investing in superior machinery, like that from Dinosaw Machine, transitions your business from reactive problem-solving to proactive quality assurance.
Many polishing issues begin with the initial cut. A saw that vibrates or deflects during cutting will leave an uneven surface with subtle striations that are difficult and timeconsuming to polish out.
Our Mono-block Bridge Saws are engineered with a heavy, single-piece frame. This design minimizes vibration and ensures exceptional rigidity, delivering cleaner, more precise cuts that require less grinding and polishing.
This saves you time, labor, and abrasive costs from the very start.
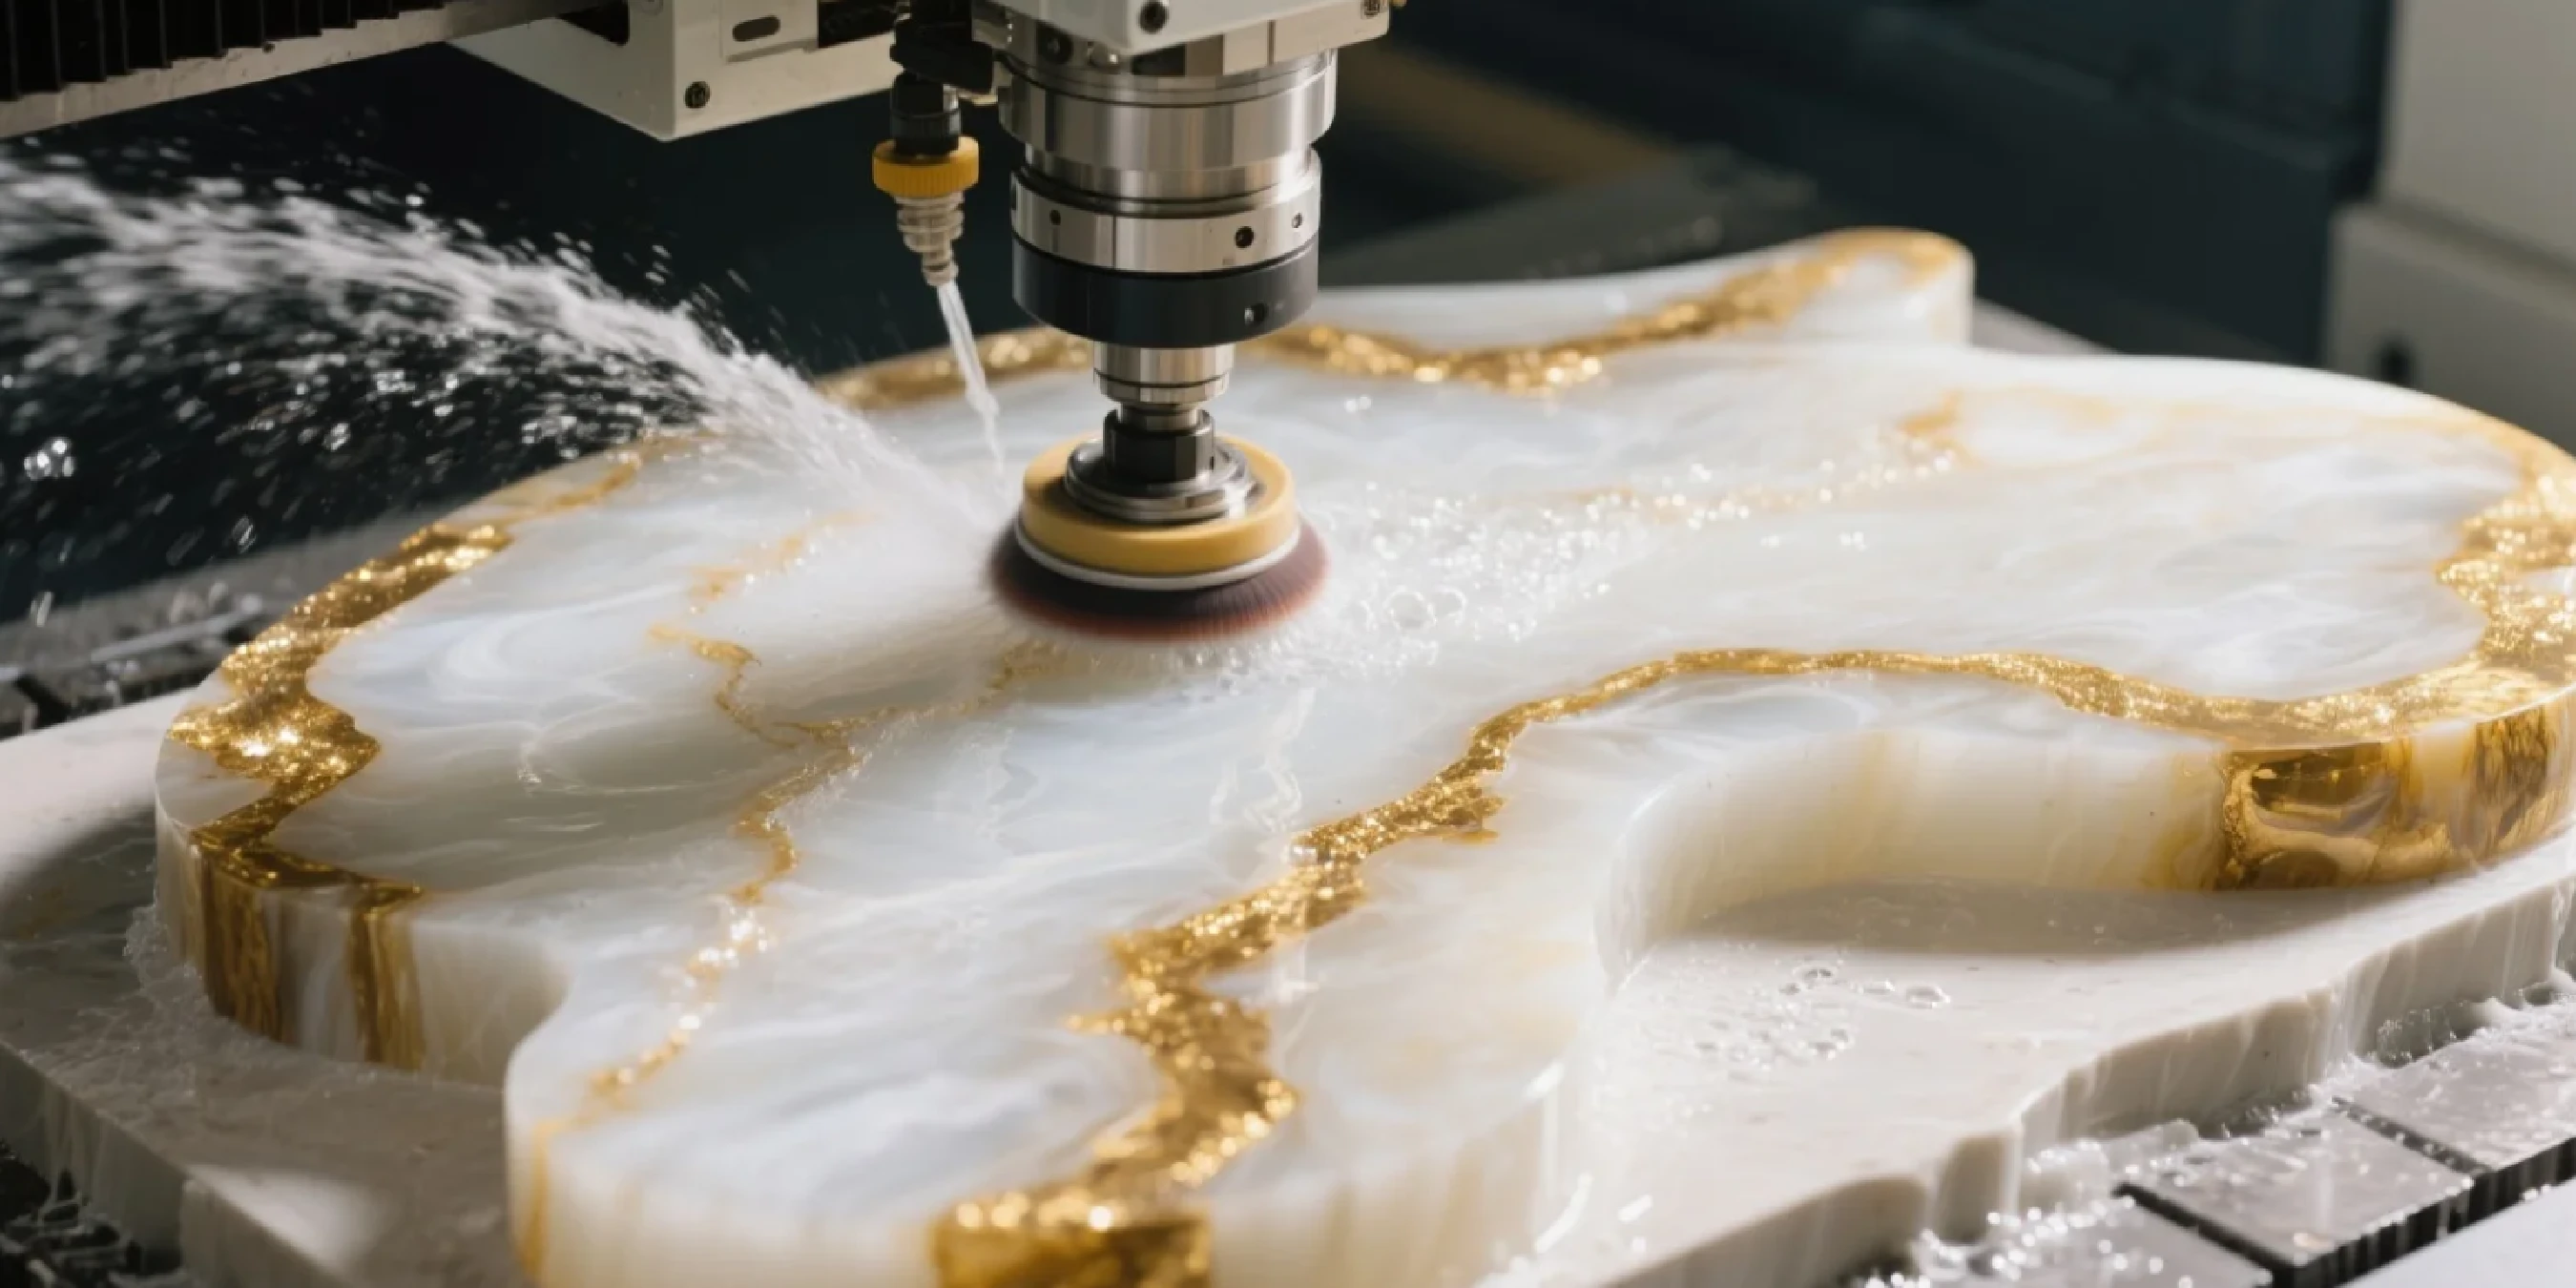
Edges are notoriously difficult to polish consistently by hand. Manual polishing is slow, physically demanding, and heavily reliant on operator skill, making uniform quality across a large project nearly impossible.
Our Automated Edge Polishers solve this problem. They utilize a calibrated multi-head system that applies consistent pressure and follows a precise grit sequence automatically.
This delivers a perfect, factory-quality edge every time, regardless of the operator. This technology transforms edge finishing from an art into a repeatable science.
What's more, a critical part of the process is ensuring worker safety. Wet processing is essential not just for a good polish but also for controlling dust. As highlighted by OSHA resources on Crystalline Silica Exposure , effective water delivery systems are vital to protecting your team from respiratory hazards.
Dinosaw machines are designed with robust, high-volume coolant systems that prioritize both finish quality and operator safety.
Swirl marks and hazing are not unavoidable costs of doing business. They are feedback, telling you that there is an imbalance in your fabrication process.
By moving beyond temporary fixes and adopting a systematic approach-calibrating your machine parameters, standardizing your tooling and grit sequence, and managing your coolant-you can dramatically improve your finishing quality.
Ultimately, the most effective way to eliminate these chronic headaches is to invest in machinery that is engineered for precision and stability. High-quality equipment from Dinosaw Machine provides the reliable foundation you need, reducing the variables and operator errors that lead to defects.
This allows you to spend less time reworking mistakes and more time producing perfect slabs that delight your customers and grow your bottom line.
Ready to upgrade your machinery or optimize your entire polishing process? Let's build a solution tailored to your shop's needs. Get a custom quote today ().
The main cause is an incorrect polishing process, typically skipping grit steps. This leaves deep scratches from coarser pads that finer pads cannot remove. Other major causes include excessive spindle speed (RPM) which burns the stone, and insufficient water which fails to clear away abrasive slurry.
Yes, you can polish swirl marks out of quartz, but it requires extreme care. Quartz contains polymer resins that can easily burn if too much heat is generated. Use pads designed for engineered stone, maintain a lower RPM (typically 1000-1500), and ensure constant, high-volume water flow to keep the surface cool. Always start with a medium grit (e.g., 400) to assess the repair before moving to a full sequence.
For granite, a general RPM range is between 1200 and 1800. However, this varies. Harder granites can tolerate the higher end of this range, while softer or resin-treated stones may require lower speeds to prevent burning. The best practice is to start around 1400 RPM and observe the results, adjusting the speed and feed rate based on the specific stone and the feedback from the machine.
You know pads are worn when they stop cutting effectively and start taking much longer to remove scratches. Visually inspect them for a loss of diamond grit, glazing (a shiny, smooth surface), or tearing of the resin. A simple test is to feel the surface; if it feels smooth instead of gritty, it's likely time to replace or re-dress the pad.
A hazy or cloudy finish is usually caused by three things: 1) insufficient cleaning between grit stages, leaving a fine slurry that dulls the surface; 2) using worn-out or poor-quality high-grit pads (1500/3000); or 3) excessive heat that slightly burns the stone's surface or resins. Ensure a thorough rinse between every step and verify your final pads are in good condition.
Yes, an automatic edge polisher almost always produces a superior and more consistent finish. A machine like the Dinosaw Automated Edge Polisher applies perfectly uniform pressure and speed, which is impossible for a human to replicate by hand over a long edge. This mechanical consistency eliminates the high and low spots that cause waviness and ensures every inch of the edge receives the exact same treatment, resulting in a flawless, factory-quality polish every time.
Absolutely. A final polish can only be as good as the initial cut. A bridge saw with a weak frame that allows for vibration or blade deflection will leave a slightly uneven or striated surface. This forces your polishing station to work much harder to flatten the stone before it can even begin polishing, increasing time and the risk of defects. A rigid, stable machine like a Dinosaw Mono-block Bridge Saw provides a perfectly smooth and true cut, creating the ideal canvas for a quick and flawless polish.
 English
Get A Easy Solution
Chat Online
Hi, this is Lizzy from Dinosaw ( Not a Robot ). Which Machine ( model ) do you want? Please WhatsApp us now
Hello 👋 How can we help?